April 14, 2010 at 12:46 PM
—
2102

Sooner or later you will migrate yourself to Exchange Server 2010 and will find yourself in need to uninstall Exchange Server 2007 CCR… ;)
Before beginning with uninstall procedure make sure that you moved everything away to new servers (Mailboxes, OAB generation,…)!
Uninstall Exchange Server 2007 from Pasive node
- Login to pasive node and check whether Exchange CMS is located on active node with Get-ClusteredMailboxServerStatus cmdlet from Exchange Management Shell.
- Open a Command Prompt window and change path to %ProgramFiles%\Microsoft\Exchange Server\bin.
- Run Setup /mode:uninstall
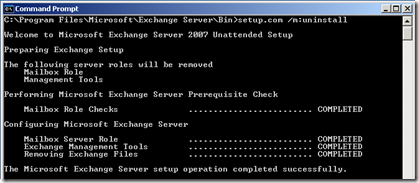
Evict pasive node from Windows Cluster
- Open a Command Prompt window.
- Stop the Cluster service by running following command
net stop clussvc
- After the Cluster service has been stopped, evict the node by running the following command: Cluster <ClusterName> node <NodeName> /evict.
Cluster CN-WC01 node CN-CCR02 /evict
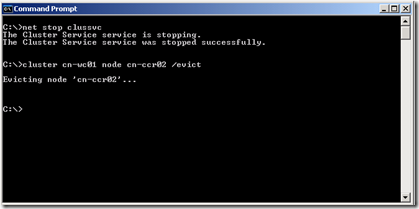
Remove CMS from Active Node and uninstall Mailbox role
- Login to active node and run command prompt
- Change path to C:\Program Files\Microsoft\Exchange Server\Bin (this is default location)
- Run: Setup.com /mode:uninstall /removeCMS /CMSName:CN-EC01
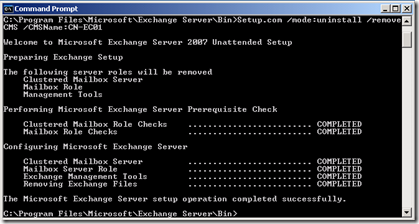
The last step is to Destroy Windows Cluster (Right click on the cluster name then choose More Actions > Destroy Cluster in Windows Server 2008 or follow KB282227 for Windows Server 2003). :)
KB282227 - How to uninstall the Cluster service on a Windows Server 2003 cluster
February 1, 2008 at 3:50 PM
—
2102

Welcome to the third part of Upgrading Exchange Server 2007 to Service Pack 1 (SP1).
In previous parts we looked into necessary procedures for preparing Active Directory and upgrading HUB/CAS roles (or single Exchange Server with HUB, CAS and Mailbox role installed) to Service Pack 1.
In this part we will go trough necessary steps for successful upgrade of Exchange 2007 Single Copy Cluster to Service Pack 1.
Important!
Prior installing SP1 read carefully section with prerequisites (install necessary components and updates on Windows Server, upgrade antivirus software for Exchange Server) from my previous post Upgrading Exchange 2007 to SP1 (Part 1)!
Installing Service Pack 1
Upgrading Single Copy Cluster (SCC) to SP1 is different from upgrading non-clustered Mailbox Role to SP1 in many ways. Notice that in Part 1 and Part 2 we were using both GUI and unattended mode but only option for cluster upgrade is using unattended mode.
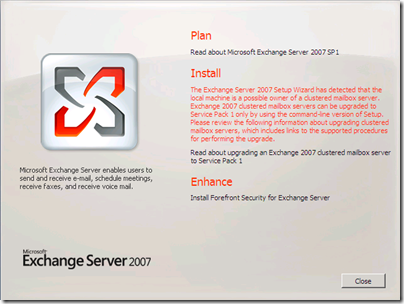
Required permissions
What are the minimal permissions you need for successful upgrade? Exchange Server Administrator membership and Local Administrator on servers is required.
Demo infrastructure
For the demo purposes we will use only two-node cluster setup. Active node named E2K7-NODE1, passive node named E2K7-NODE2 and exchange cluster named E2K7-MBX.
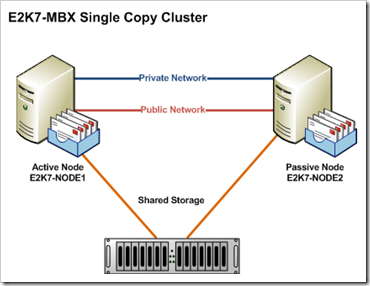
Setup for demo upgrade to SP1
Upgrade steps for Passive Node (E2K7-NODE2)
- Move all Cluster Groups to active node (E2K7-NODE1).
- Set Windows Firewall/Internet Connection Sharing (ICS) service to Manual or Automatic and start it. This service is disabled by default. During upgrade procedure this allows setup to add firewall exceptions for Exchange Server services. You can stop and disable this service after upgrade!
It also works if you leave Windows Firewall/Internet Connection Sharing disabled but no firewall exceptions for Exchange Server services are created during setup. I recommend that you start Windows Firewall/ICS service during setup and than stop/disable it if you are not using Windows Firewall service!
- Stop any services that have open handles to performance counters (for example: Performance Logs and Alerts, MOM agents,...) - performance counters are changed during upgrade procedure.
- Stop, and then restart the Remote Registry service.
- From command prompt run setup.com /m:upgrade from folder with SP1 setup files.
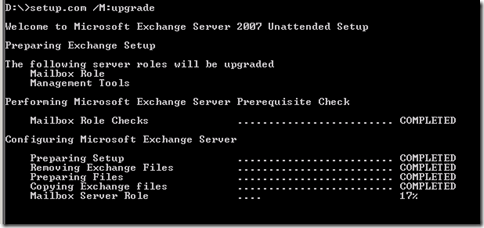
- After successful upgrade reboot Passive Node (E2K7-NODE2).
- Log on to server after reboot and open Exchange Management Shell.
- Use the Stop-ClusteredMailboxServer cmdlet to stop the clustered mailbox server.
Stop-ClusteredMailboxServer E2K7-MBX -StopReason "SP1 Upgrade."
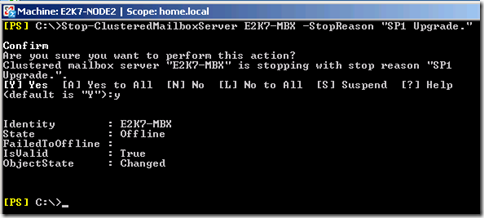
- Use Move-ClusteredMailboxServer cmdlet to move the clustered mailbox server (CMS) from Active Node (E2K7-NODE1) to Passive Node (E2K7-NODE2). You must run this from Passive Node (E2K7-NODE2).
Move-ClusteredMailboxServer E2K7-MBX -TargetMachine E2K7-NODE2 -MoveComment "SP1 Upgrade."
- From command prompt run setup.com /upgradecms from folder with SP1 setup files.
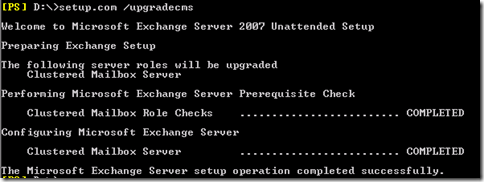
Notice that I actually executed this command from Exchange Management Shell ;-)
Upgrade steps for Active Node (E2K7-NODE1)
- Set Windows Firewall/Internet Connection Sharing (ICS) service to Manual or Automatic and start it. This service is disabled by default. During upgrade procedure this allows setup to add firewall exceptions for Exchange Server services. You can stop and disable this service after upgrade!
- Stop any services that have open handles to performance counters (for example: Performance Logs and Alerts, MOM agents,...) - performance counters are changed during upgrade procedure.
- Move Windows Cluster "Cluster Group" to Passive Node
Cluster group "cluster group" /move

- Stop, and then restart the Remote Registry service.
- From command prompt run setup.com /m:upgrade from folder with SP1 setup files.
- Reboot node after successful upgrade.
- You can disable Windows Firewall/Internet Connection Sharing (ICS) now.
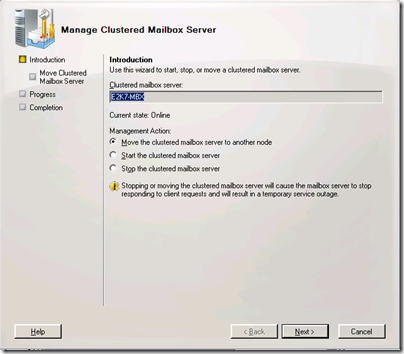
Congratulations, your Single Copy Cluster is now upgraded to Service Pack 1. During upgrade procedure we changed ownership of Cluster Groups. If you would like to move groups back to previous owner you can use previous mentioned steps or you can use one of new features in Exchange Server 2007 Service Pack 1 called Manage Clustered Mailbox Server wizard for desired actions.
Related:
September 3, 2007 at 1:42 PM
—
2102
Exres.dll is Resource DLL of Exchange Server. It acts like "proxy" in communication between Windows Cluster Services and Exchange Services. Windows Cluster service communicates trough Resource Monitor to Exres.dll, and Exres.dll communicates with the Exchange services. This .dll is responsible for reporting failures in the cluster and bringing resources onnline/offline.
September 1, 2007 at 11:56 AM
—
2102
Describes the installation and configuration of a High-Performance Computing (HPC) cluster for a dual boot of Microsoft Windows Compute Cluster Server 2003 and the Linux OpenSuSE Operating System (OS).
Download it here.